Provisioning Always Encrypted in SQL Databases with Azure Key Vault, using SSMS 2016.

This article focuses on the steps on how to configure the Always Encrypted (AE) feature for SQL Databases using Azure Key Vault as the key store provider; which is still in preview at the time of this writing.

In order to try out what I have explained here you should have January 2016 preview or upper version of SSMS.

You can download the January 2016 preview version here

Please note this is not an article to discuss about what AE is and how it works nor an introduction to Azure Key Vault. I recommend to read these following posts before continuing this article in order to get the full understanding.

Settings up Always Encrypted in SQL Database using Azure Key Vault

In order to set up the Always Encrypted, first we need to create Column Master Key (CMK) and Column Encryption Key (CEK).

Creating CMK.

Navigate to the SQL Databases using SSMS. Expand the database node and then expand the Security section. Under the Security section you will see Always Encrypted Keys node. Right click on that and you will see the menu, shown in the below image.

image

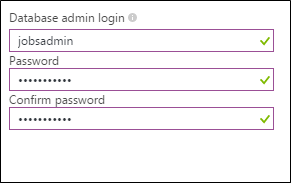
Select ‘New Column Master Key’ and you will get the below dialog box. Name your CMK (cmk1) and then select the Azure Key Vault as Key Store. Click the Sign In button to login to Azure subscription.

image

You should use an Azure account with at least co-admin privileges to the Azure subscription where the Azure Key Vault is. After signing in you will see the list of Azure Key Vaults in the drop down, choose the one you want to use as KMS for the CMK.

image

Click Generate Key and let the Azure Key Vault generate a key for you. This will be your CMK.

Creating CEK.

As shown in the below image right click on the ‘Column Encryption Keys’ node and create a CEK.

image

You will get a dialog box shown below. Name the CEK and choose the CMK created above. image

When you select the CMK stored Azure Key Vault, you will see the Azure login dialog. Here you should enter the credentials of the user who has permission to access the particular key in the vault. If not you will get an error analogous to the below dialog.

image

In order to give the permission to the key from to the specific user, execute the following PowerShell script.

image

Note: When you create the CMK you login to Azure using a co-admin credential who has access to Vault, but that does not make him/her able to manage the keys created. So using the same credentials when creating the CEK might produce the above error. You should give permissions to the user account which is used to access the keys in the Vault.

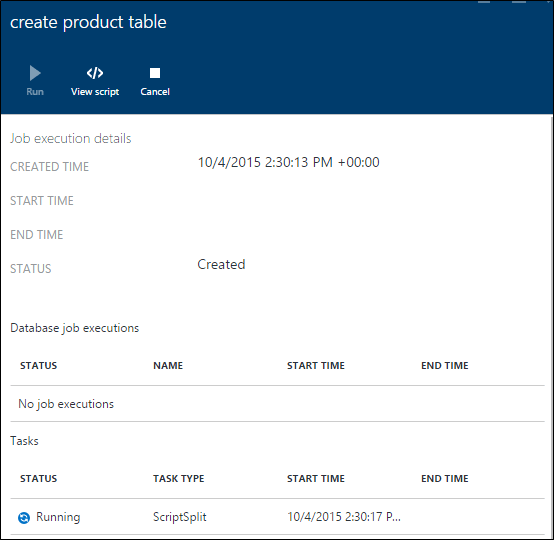
Now the setup of creating CMK and CEK are done. Let’s create a table.

Execute this script in order to create the table in the database. (click on the images to enlarge)

image

We have created a table with 3 columns 2 of them are encrypted using CEK1 with Always Encrypted Feature. This completes the setup in the SQL Database.

You can query the database for more information about the Always Encrypted settings. You will find some useful queries in this article.

Application Setup

We are done with all the setups in the SQL Databases, in order to work with the Always Encrypted feature enabled database we need a .NET 4.6 application.

Also since we use Azure Key Vault as the key store provider, we need to implement a custom provider, this could be done by implementing the SqlColumnEncryptionKeyStoreProvider abstract class in System.Data.SqlClient.

You can find an implementation here.

Below is the core code snippets of the implementation.

image

The connection settings goes like below.

image

Implementing the GetToken method

Only AAD identities can access Azure Key Vault, so now our application needs an AAD identity in order to communicate with the Azure Key Vault.

So we need an AAD application which has permissions to the Azure Key Vault in order to access Azure Key Vault programmatically.

Create an AAD app and the App Id and the App secret key.

And the set the permission for the app in the Key Vault in using PowerShell.

image

So the GetToken method goes as below.

image

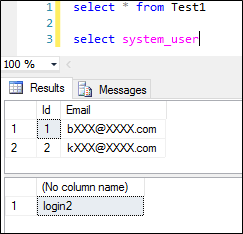
In the above snippet the provider name is AZURE_KEY_VAULT, you can retrieve this information by executing the following TSQL command.

image

After all the setups the application and the database both are ready with Always Encrypted enabled with Azure Key Vault.

Advertisement

SQL Server Dynamic Data Masking not working. Are you using the correct role permissions?

You have implemented the Dynamic Date Masking (DDM) in your SQL Database, but still you get the unmasked data. Are you using the correct role permissions and the correct logins?

I published a post before the general availability (GA) of DDM about what you need to know about the DDM GA.

There were two key points were highlighted about the DDM GA. They were

  • SQL Logins will be removed from the exclusion list and you have to specify the SQL users or Azure AD users directly in the exclusion list.
  • SQL users with administrative privileges are always excluded from dynamic data masking

I have mentioned those in the published article as well, the issue is at the time of that writing db_owner permissions also see the masked data, but recently I noted that db_owner can see the data unmasked. Data is only masked for the data_reader.

So if you’re seeing the unmasked data make sure, to use data_reader permissions to the users from whom you want to mask the data.

The issue is user with administrative privileges includes the db_owner as well, but I still have concerns on this, where we do not generally consider db_owner as an admin level permission.

I’m in some disucssions with the Microsoft internals regarding this change and told this change was made right before the GA. The documenations of DDM do not explain this. I will do the comments under this post if any interesting news come in.

What you need to know about SQL Database Dynamic Data Masking before the GA

Please read this post after reading this, as some critical changes have gone to the DDM feature of SQL Databases in GA
SQL Database Dynamic Data Masking will be Generally Available (GA) very soon by the end of this month.

For more information about Dynamic Database Masking please read this article.

As per the article you can configure the dynamic data masking on columns which have sensitive data, and also we have the options to specify the SQL Logins which should be excluded from masking. Meaning any user connecting to the database using the specified SQL login will see the data without being masked.

  • SQL Logins will be removed from the exclusion list and you have to specify the SQL users or Azure AD users directly in the exclusion list.
  • SQL users with administrative privileges are always excluded from dynamic data masking

Example:

In a SQL Database server with a SQL Database named Db1 there are 3 SQL logins.

SQL Login

SQL user

Privilege

thuru Thuru Admin (sa) for the server
login1 User1 db_owner for Db1
login2 User2 db_owner for Db1

First thing to note is, after the GA of the feature you cannot user SQL login names in the exclusion list in the portal meaning that you cannot specify login1, login2 in the list. Instead of specifying the SQL login you should specify the SQL users as user1, user2.

And SQL users who have administrative privileges always see the data.

Look at the image below as I have specified only user1 in the exclusion list.

Login to the database as thuru and executing a SELECT statement results this.

As you see, though I haven’t specified the admin user in the exclusion list, still admins are automatically excluded from dynamic data masking. If you’re using admin users in your application and enabled dynamic data masking, you have to create other SQL logins to access the database.

Login to the database as user1 and user2 outputs the following results respectively.

How to create other SQL Logins in SQL Database

Login to the server using the admin user.

  1. Select the master database and create the logins using this command.

  2. Connect to the database you want to add the user to and add the user using the created SQL login in step 1

  3. Add roles to the user

Azure Elastic Database Pool – Managing SQL Databases in breeze

If you have multiple SQL databases in Azure and looking for a centralized management solution, then Elastic Database Pool is the one you’ve been looking for.

Elastic Database Pool is a feature that you can enable in SQL Database Servers which has V12 update. Elastic Database Pool is still in preview as of this writing, so you should agree the preview terms in order to use this.

Azure Elastic SQL Database Pool allows you to manage different databases at a centralized single user interface. This is a breeze feature especially if you have a SaaS application running on Azure with the single tenant strategy for your database layer. You will have different databases for each customer and rolling out updates on each database is not only a time consuming task, but also very annoying and error prone task too. Most of the developers use scripted tools either purchased from some third parties or build their own custom tools to manage collection of SQL databases. But with the introduction of Azure Elastic Database Pool, you can centrally manage your SQL databases as group.

You can add / remove any database to and from the pool when desired, apart from the centralized management – which is a very important feature for devs, cost wise benefits also possible in Elastic SQL Database Pool. Because the pool has a DTU count which is known as eDTU (elastic data through put units) shared across the databases in the pool. So there’s no fixed DTU allocation for the databases.

For example, consider that your application has customers across the globe and the database usage varies based on the time zone. If you’re using SQL Databases without adding them to the pool, you have to allocate a fixed DTU (let’s say 50) for each customer database. Assuming you have 2 databases, each has 50 DTUs allocated and are in different time zones. Your application has traffic only in the day time, during the night the DTUs are unused but you’re still paying for that tier.

But if you can put those databases in an Elastic Database Pool with an eDTU of 50 or little bit more than 50, both databases will run smoothly at a reduced cost. Because when one database is not in use the Elastic Database Pool will allocate the eDTUs to the other database. And also Elastic Database Pool has the flexibility to set the minimum and maximum number of eDTUs for databases.

Creating an Elastic SQL Database Pool

  • Go to the new Azure portal and select the SQL Database Server on which you want to create a pool. One server can have multiple pools. But one database can be attached to only one pool. In the server blade click on the Add pool button.

  • Give a name to the pool. Select the pricing tier, and you can add databases to the pool at this time or later. Note the ‘Configure Performance Section’ and you can adjust the eDTU and the storage capacity for the pool. Also you can set the minimum and maximum eDTU usage per database. You can change these settings later. The number of databases per pool, the total number of eDTUs and the maximum size of the pool are determined by the pool’s pricing tier.

Managing the Elastic Database Pool

Now we have a pool and let’s see how to manage the databases in the pool. Managing the pool is done through the jobs, it requires certain installation in your azure subscription, which includes a cloud service, SQL Database, service bus and a storage account. You can click on the Manage or Create jobs button in the Elastic Pool blade, and if you haven’t set up the Jobs you will see the below screen for the first time. Jobs are in the preview stage and you should accept the preview terms, and also setup a credential. This credential will be used as the administrator credential for the Jobs SQL database.

After setting up the required resources for the jobs, now you can create jobs. Below screen shows the jobs creation blade. Jobs are scripted in TSQL, and note that here I have provided the credential of the SQL Server I want my script to run, not the credential of the Jobs SQL database.

I have the option to run the jobs immediately and also save them and run later. You can see the jobs in the Manage Jobs blade.

You can start a job by clicking Run and it will show real time updates about the job status.

All my databases are updated.

Elastic Database Pool is very convenient and a powerful approach to manage multiple databases as a group.

Elastic Database Pool Jobs is an application which is a hosted cloud service, which has a SQL database, a service bus and a storage account, these resources are charged separately in addition to the Elastic Database Pool cost.

SQL Azure Database best practices and TDD

This post summarizes the set of good practices you should follow when developing application on SQL Azure and how to arrange TDD or unit tests based on those practices.

Before continue reading this post, I assume that you are familiar with SQL Azure Databases, Entity Framework and TDD.

One of the highly regarded and strongly recommended cloud development strategies is resilient development, meaning that the application should expect the failures and handle them. This is more than catching the exceptions and informing to users, this includes retry logics, trying alternatives or any other way to mitigate / reduce the failure and user frustration.

Resilient Development in SQL Azure

When accessing a SQL Azure Database we should implement resilient mechanisms. EF provides an execution strategy interface to put custom logic on retrying errors. You can read more about the execution strategies here

There’s a dedicated implementation of the execution strategy named SqlAzureExecutionStrategy especially for the SQL Azure Databases.

Before continuing let us discuss why we need to implement this execution strategy and why it is highly recommended when using SQL Azure databases. You can list many transient failures in accessing databases, but I list the following two are the main culprits.

  • SQL Azure is a database as a service. Applications talk to SQL Azure through the Internet and there is a high probability of communication breakage.
  • SQL Azure has a concept of DTU (Data Throughput Units) which is a number assigned to a database, which directly maps to the usage of CPU, memory and IO. You can say that a database with higher DTU has more throughput. Since DTU is a limiting factor, when the databases reach the maximum allocated DTU usage, they start to throttle the requests, which might produce timeout exceptions.

Implementing the execution strategy comes with the limitations, mainly we cannot handle custom transactions if we implement execution strategy. So needless to say that we should implement it in a way that we can control it.

This link describes the limitations and provide the pattern to implement controllable execution strategy.

Limitation on TDD / Unit Tests

Before proceeding just by the above sub heading do not get mislead to the conclusion that TDD is same as Unit Tests, they are different approaches.

As you have read in the above link now we know the importance of implementing execution strategy and the limitations. In our unit tests we implement transactions because we can rollback them. This is very essential when running tests on production databases, so we can rollback changes done by the unit tests and leave the database unchanged after the text execution regardless of whether the tests have passed or not.

This is a great article which provides details on how to implement such a test base class.